
Starting an online store can feel overwhelming. There are products to source, themes to choose, payments to configure, and a hundred small decisions in between.
The good news? Shopify makes it easier than any other platform. In this guide, we’ll walk you through exactly how to set up a Shopify store from scratch. No fluff. No jargon. Just clear, actionable steps. You’ll also get a complete Shopify store setup checklist (embedded below and available as a free PDF). By the end, you’ll know exactly what it takes to launch a Shopify store that actually converts.
Let’s get into it.
Why Choose Shopify in the First Place?
Before we dive into the setup process, let’s quickly address the “why.” Shopify powers over 4.8 million stores worldwide. It handles everything from hosting and security to payments and shipping. You don’t need to code. You don’t need to manage servers. You don’t need a tech team. You just need a product and a plan. Shopify is fast. It’s secure. It scales from a $0 hobby store to a $100M+ enterprise brand. And with a 3-day free trial (plus $1/month for the first three months), there’s almost zero risk to get started.
Ready? Let’s set up your store.
Step 1: Plan Before You Build
This is the step most people skip. Don’t. Before you touch Shopify, answer these three questions:
- Who is your target customer? Get specific. Age, location, interests, problems.
- What problem does your product solve? Or what desire does it fulfill?
- How will customers find you? SEO, paid ads, social media, influencers?
Spend an hour here. It will save you weeks later. Also, decide on your business model:
- Sell your own products (handmade, designed, manufactured)
- Wholesale (buy bulk, resell at markup)
- Dropshipping (no inventory, supplier ships direct)
- Print-on-demand (designs printed when ordered)
- Digital products (courses, templates, downloads)
Your model shapes your Shopify store setup decisions, especially around shipping, inventory, and apps.
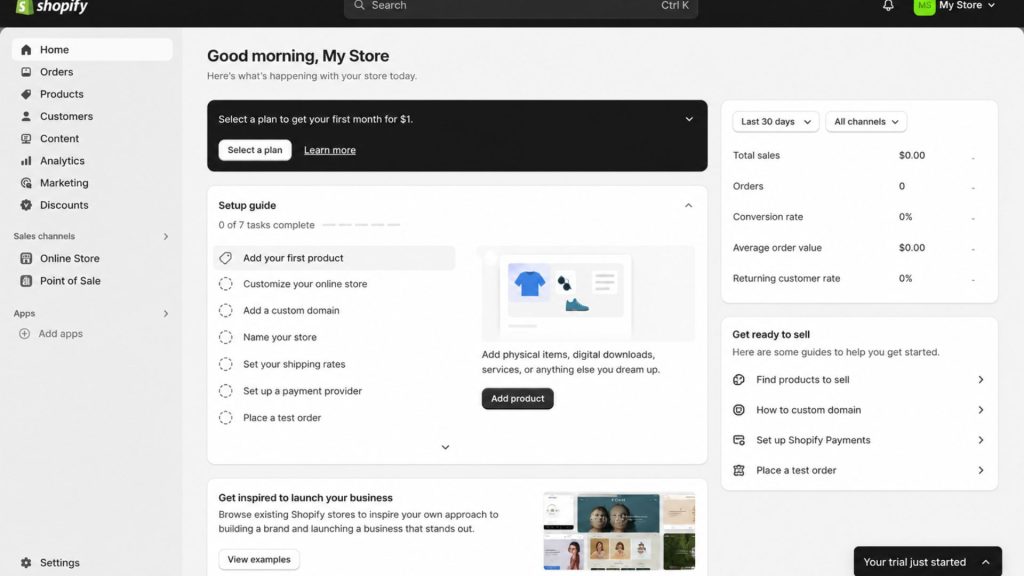
Step 2: Create Your Shopify Account
Now the fun begins. Go to shopify.com and click “Start free trial.” You’ll be asked a few quick questions about your business. Answer them honestly. They help Shopify customize your dashboard. You’ll then create your account with an email, password, and store name. Don’t overthink the store name at this stage. You can change it later. Shopify also generates a temporary URL like yourstore.myshopify.com. You’ll replace this with a custom domain soon.
Pick the plan that matches your stage:
- Basic ($29/month annually) – Perfect for new stores
- Shopify ($79/month annually) – For growing brands
- Advanced ($299/month annually) – For high-volume sellers
- Plus ($2,300/month) – For enterprise scale
Start with Basic. You can upgrade anytime.
Step 3: Buy and Connect a Custom Domain
A custom domain (yourbrand.com) builds trust instantly. Customers don’t take .myshopify.com URLs seriously. You have two options:
- Buy a domain through Shopify ($14–$20/year). Easiest. Auto-configures.
- Buy from a third party like Namecheap or GoDaddy. Cheaper. Requires DNS setup.
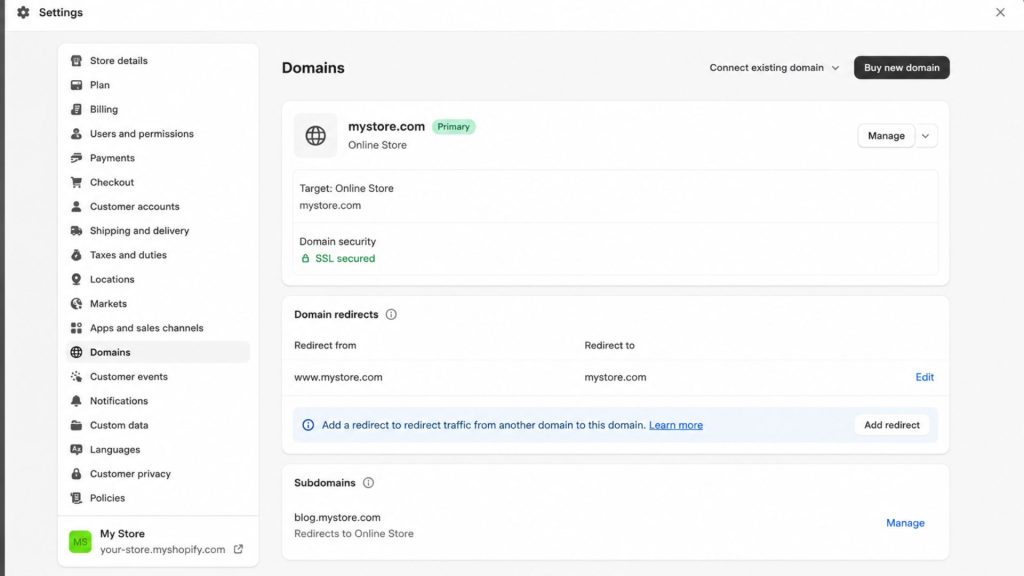
Once purchased, connect the domain inside Shopify under Settings → Domains. Set it as your primary domain so all traffic routes there. Keep your domain short, brandable, memorable, and easy to spell. Avoid hyphens and numbers.
Step 4: Choose and Customize Your Theme
Your theme is your store’s design foundation. Shopify offers free and paid themes in its Theme Store. Free themes like Dawn, Refresh, and Craft are clean, modern, and fast. They’re perfect for most new stores. Paid themes ($180–$400 one-time) offer more layouts, sections, and pre-built design patterns. Popular options include Impulse, Prestige, and Symmetry.
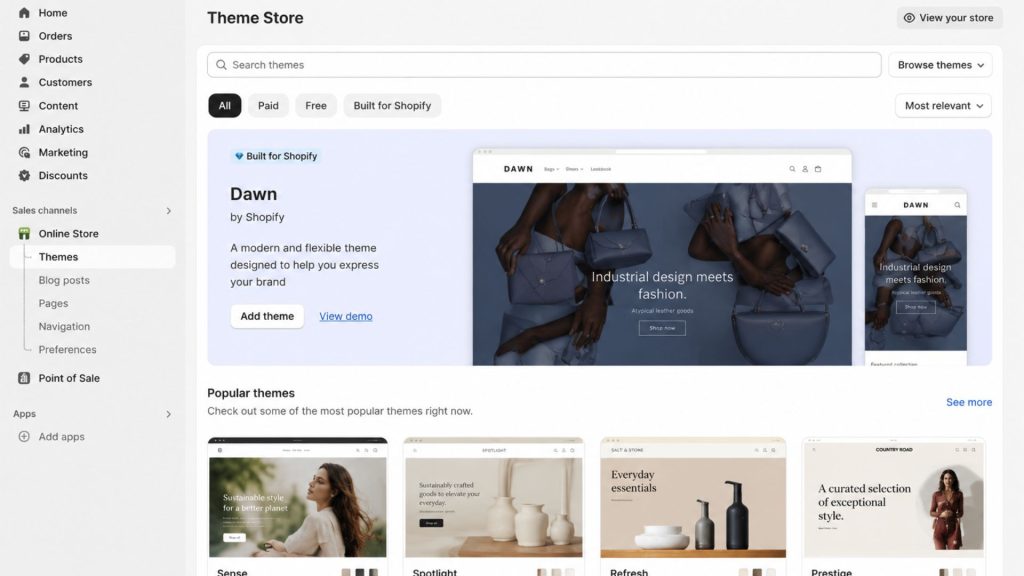
Look for a theme that:
- Loads fast (under 3 seconds)
- Looks great on mobile (over 70% of traffic)
- Matches your brand vibe
- Has the sections you need (testimonials, video, lookbook)
Once installed, customize your theme through the editor. Add your logo, set brand colors, pick fonts, and arrange homepage sections. Don’t aim for perfect. Aim for clean and clear.
Step 5: Add Your Products
This is where your store comes alive. For each product, you’ll need:
- Title – Clear, descriptive, includes keywords
- Description – Benefits first, features second. Use short paragraphs and bullets.
- Images – At least 4–6 per product. High resolution. Multiple angles. Lifestyle shots.
- Price – Including compare-at price for discounts
- SKU and inventory – Track quantities accurately
- Variants – Size, color, material if applicable
- Tags and collections – For navigation and filtering
- SEO title and description – Helps you rank on Google
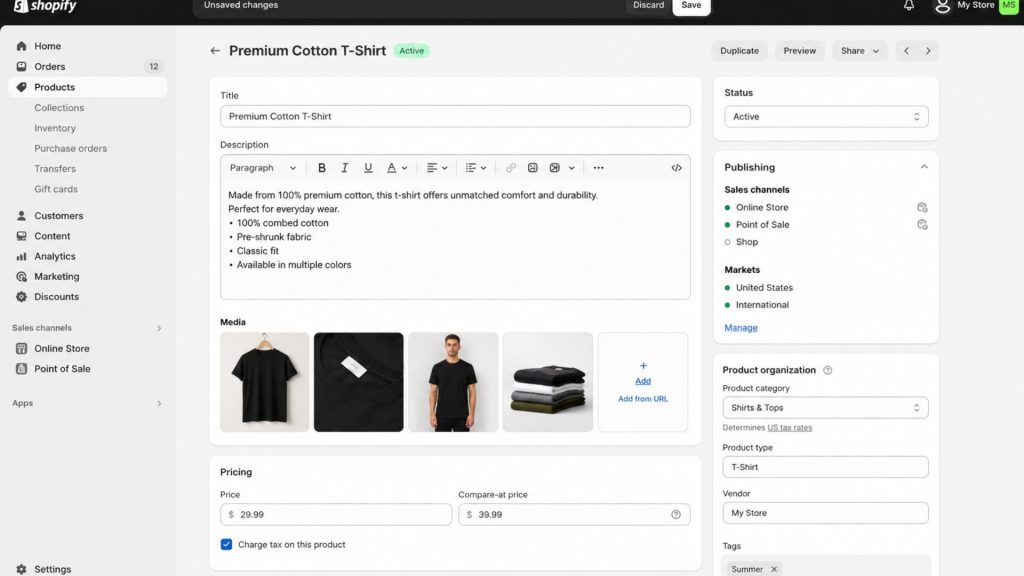
Pro tip: Don’t upload all products at once if you have hundreds. Start with your 10–20 best sellers. Get the experience right. Then bulk upload the rest.
Step 6: Build Your Essential Pages
Every Shopify store needs these core pages:
- Homepage – Hero banner, featured collections, social proof, USPs
- About Us – Your brand story, mission, team
- Contact – Form, email, address, support hours
- FAQ – Top 10–15 customer questions
- Shipping Policy – Rates, times, regions
- Return & Refund Policy – Conditions, timeframes, process
- Privacy Policy – Required by law (GDPR, CCPA)
- Terms of Service – Legal protection
Shopify generates legal policies automatically under Settings → Legal. Use these as a starting point and customize. Strong pages reduce friction. Weak pages kill conversions.
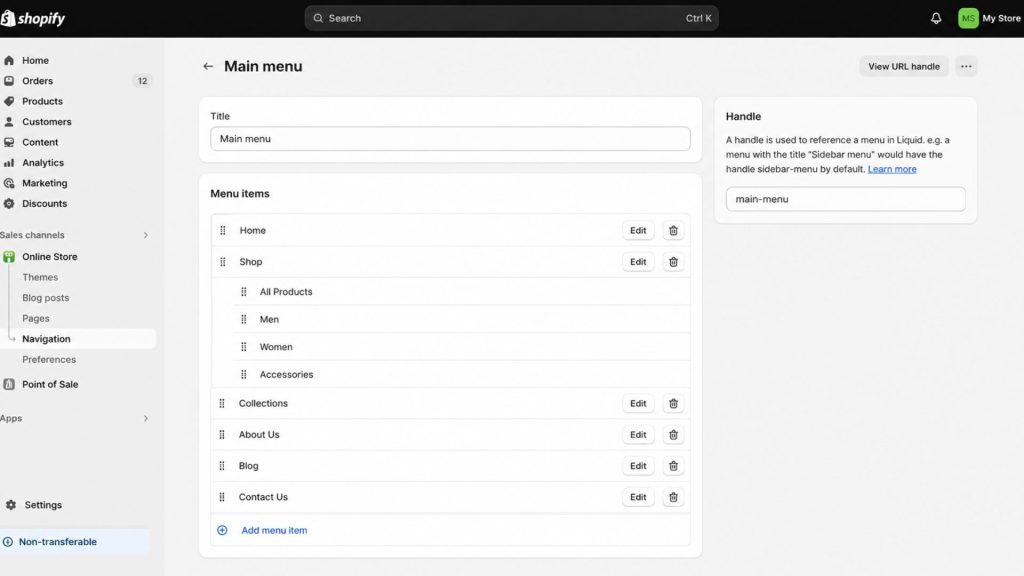
Step 7: Set Up Navigation
Your menu is your customer’s roadmap. Keep it simple. Most successful stores use this structure:
- Main menu: Shop / Collections / About / Contact
- Footer menu: Policies / FAQ / Contact / Social links
Inside “Shop,” add your collections (Men, Women, Sale, New Arrivals, etc.).
Avoid menu bloat. Confused customers don’t buy.
Step 8: Configure Payments
This is critical. Without payments, you have a portfolio, not a store.
Go to Settings> Payments, then activate Shopify Payments. It’s the default processor and works in 20+ countries. Transaction fees range from 1.5% to 2.9% depending on your plan and region.
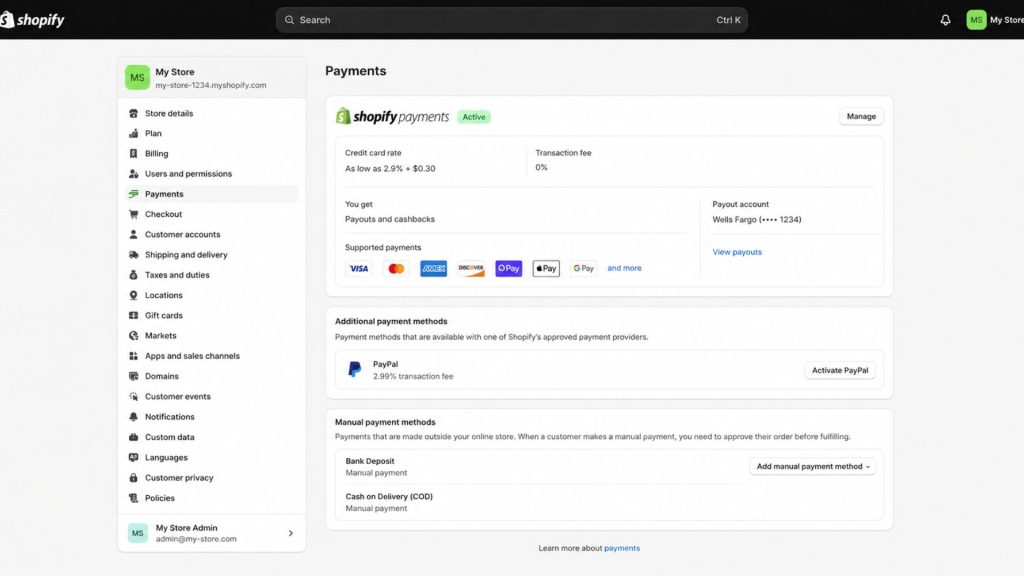
Also enable:
- PayPal – 30%+ of shoppers prefer it
- Apple Pay & Google Pay – Faster mobile checkout
- Shop Pay – Shopify’s accelerated checkout (up to 50% higher conversion)
- Buy Now Pay Later (Shop Pay Installments, Klarna, Afterpay) – Boosts AOV
The more payment options, the higher your conversion.
Step 9: Set Up Shipping

Shipping makes or breaks ecommerce. Get this right. Under Settings, go to Shipping and delivery, configure:
- Shipping zones – Countries and regions you ship to
- Shipping rates – Flat, calculated, free, or tiered
- Shipping profiles – Different rules for different products
- Carriers – Connect USPS, UPS, FedEx, DHL
Three strategies that work:
- Free shipping over $X – Increases AOV
- Flat rate – Predictable for customers
- Real-time carrier rates – Most accurate (Advanced plan or higher)
Free shipping wins. Customers expect it. Build the cost into your product price if needed.
Step 10: Configure Taxes
Tax setup depends on your location and where you sell.
Go to Settings, then Taxes and duties. Shopify auto-calculates tax for most regions. You’ll need to:
- Add your tax registrations (sales tax, VAT, GST)
- Set tax overrides for tax-exempt products
- Configure duties for international orders
When in doubt, talk to an accountant. Tax mistakes are expensive.
Step 11: Install Essential Apps
The Shopify App Store has 8,000+ apps. You only need a few. Here’s a starter stack that works for almost every store:
- Reviews – Judge.me, Loox, or Okendo
- Email & SMS – Klaviyo or Shopify Email
- SEO – Yoast SEO or Plug in SEO
- Upsells – ReConvert or Zipify OCU
- Page builder – Shogun or PageFly (if you need flexibility)
- Analytics – Lucky Orange for heatmaps
- Loyalty – Smile.io or Yotpo

Start with free apps. Upgrade only when you hit limits. App costs add up fast.
Step 12: Set Up Analytics and Tracking
You can’t improve what you don’t measure. Install these on day one:
- Google Analytics 4 – Traffic and behavior
- Google Search Console – SEO performance
- Meta Pixel – For Facebook and Instagram ads
- TikTok Pixel – If targeting Gen Z
- Google Tag Manager – Manages all tags in one place
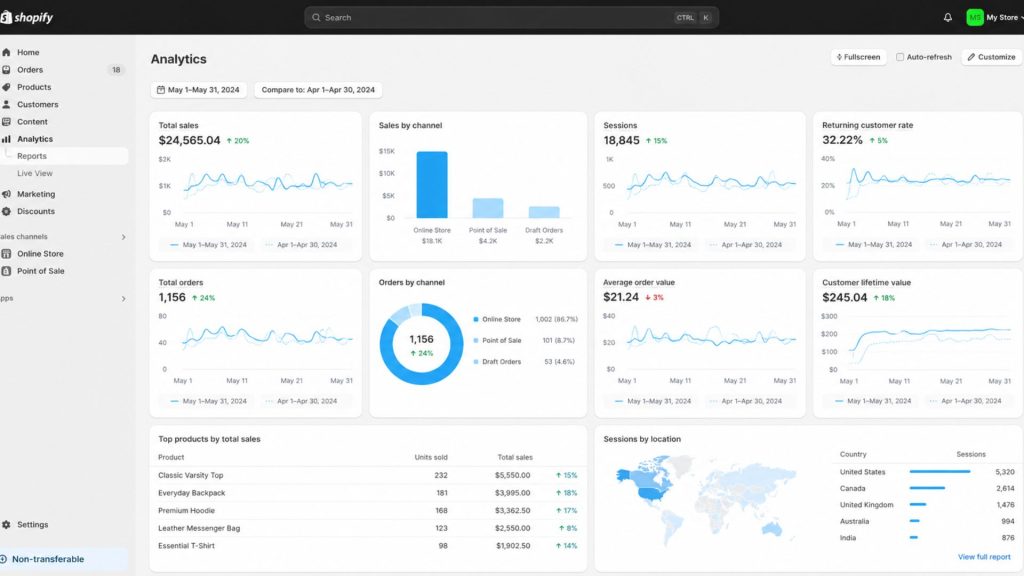
Shopify also has built-in analytics under Analytics; go to the Dashboards section. Check this daily once live.
Step 13: Optimize for SEO
Don’t wait until after launch to think about SEO. Build it in from day one. Quick wins:
- Add alt text to every image
- Write unique meta titles and meta descriptions for every page
- Use clean URL slugs (yoursite.com/blue-cotton-shirt, not /product-12345)
- Add schema markup (most themes include this)
- Create a blog for content marketing
- Build a sitemap (Shopify generates this automatically at /sitemap.xml)
SEO compounds. The earlier you start, the bigger the long-term payoff.
Step 14: Run Pre-Launch Tests
Before you flip the switch, test everything.
- Place a real test order (use a discount code for 99% off)
- Test on mobile, desktop, and tablet
- Test in Chrome, Safari, Firefox
- Check all links for broken pages
- Test checkout speed on slow connections
- Verify email notifications (order confirmation, shipping)
- Confirm tax and shipping calculations
- Check page load speed on PageSpeed Insights (aim for 80+)
A 5-second bug found pre-launch saves 5 hours of damage control post-launch.
The Complete Shopify Store Setup Checklist
Here’s your full Shopify store setup checklist – bookmark this section or grab the free PDF below.
| S.no | Phase | Task | Done |
| 1 | Planning | Define target audience and buyer persona | ☐ |
| 2 | Planning | Choose business model (DTC, dropship, POD, wholesale) | ☐ |
| 3 | Planning | Validate product-market fit | ☐ |
| 4 | Planning | Register business and get tax ID | ☐ |
| 5 | Account Setup | Create Shopify account and start trial | ☐ |
| 6 | Account Setup | Choose your Shopify plan | ☐ |
| 7 | Account Setup | Set store name, timezone, currency | ☐ |
| 8 | Account Setup | Enable two-factor authentication (2FA) | ☐ |
| 9 | Domain & Branding | Buy a custom domain | ☐ |
| 10 | Domain & Branding | Connect domain in Shopify settings | ☐ |
| 11 | Domain & Branding | Upload logo and favicon | ☐ |
| 12 | Domain & Branding | Set brand colors and fonts | ☐ |
| 13 | Theme & Design | Choose a Shopify theme | ☐ |
| 14 | Theme & Design | Customize homepage sections | ☐ |
| 15 | Theme & Design | Build collection and product page templates | ☐ |
| 16 | Theme & Design | Optimize for mobile responsiveness | ☐ |
| 17 | Products | Upload high-quality product images (4–6 per product) | ☐ |
| 18 | Products | Write SEO-optimized product titles | ☐ |
| 19 | Products | Write compelling product descriptions | ☐ |
| 20 | Products | Add SKUs, inventory, and variants | ☐ |
| 21 | Products | Organize products into collections | ☐ |
| 22 | Products | Set up product tags for filtering | ☐ |
| 23 | Essential Pages | Build homepage | ☐ |
| 24 | Essential Pages | Create About Us page | ☐ |
| 25 | Essential Pages | Add Contact page with form | ☐ |
| 26 | Essential Pages | Build FAQ page | ☐ |
| 27 | Essential Pages | Publish Shipping Policy | ☐ |
| 28 | Essential Pages | Publish Return & Refund Policy | ☐ |
| 29 | Essential Pages | Publish Privacy Policy and Terms of Service | ☐ |
| 30 | Navigation | Set up main menu | ☐ |
| 31 | Navigation | Set up footer menu | ☐ |
| 32 | Navigation | Add search bar functionality | ☐ |
| 33 | Payments | Activate Shopify Payments | ☐ |
| 34 | Payments | Enable PayPal | ☐ |
| 35 | Payments | Enable Shop Pay, Apple Pay, Google Pay | ☐ |
| 36 | Payments | Add Buy Now Pay Later options | ☐ |
| 37 | Shipping | Define shipping zones | ☐ |
| 38 | Shipping | Configure shipping rates (flat, free, calculated) | ☐ |
| 39 | Shipping | Set up shipping profiles for special products | ☐ |
| 40 | Shipping | Connect carrier accounts (USPS, UPS, FedEx) | ☐ |
| 41 | Taxes | Add tax registrations | ☐ |
| 42 | Taxes | Configure tax rates by region | ☐ |
| 43 | Taxes | Set duties for international orders | ☐ |
| 44 | Apps | Install reviews app | ☐ |
| 45 | Apps | Install email/SMS marketing app | ☐ |
| 46 | Apps | Install SEO app | ☐ |
| 47 | Apps | Install upsell/cross-sell app | ☐ |
| 48 | Apps | Install loyalty program app | ☐ |
| 49 | Analytics | Connect Google Analytics 4 | ☐ |
| 50 | Analytics | Connect Google Search Console | ☐ |
| 51 | Analytics | Install Meta Pixel | ☐ |
| 52 | Analytics | Install TikTok Pixel (if relevant) | ☐ |
| 53 | Analytics | Set up Google Tag Manager | ☐ |
| 54 | SEO | Write meta titles and descriptions | ☐ |
| 55 | SEO | Add alt text to all images | ☐ |
| 56 | SEO | Submit sitemap to Google Search Console | ☐ |
| 57 | SEO | Create blog and publish 3–5 launch posts | ☐ |
| 58 | Email Marketing | Set up welcome email flow | ☐ |
| 59 | Email Marketing | Set up abandoned cart flow | ☐ |
| 60 | Email Marketing | Set up post-purchase flow | ☐ |
| 61 | Pre-Launch Testing | Place a real test order | ☐ |
| 62 | Pre-Launch Testing | Test checkout on mobile, desktop, tablet | ☐ |
| 63 | Pre-Launch Testing | Test across browsers (Chrome, Safari, Firefox) | ☐ |
| 64 | Pre-Launch Testing | Check all internal and external links | ☐ |
| 65 | Pre-Launch Testing | Verify automated email notifications | ☐ |
| 66 | Pre-Launch Testing | Run PageSpeed Insights test (target 80+) | ☐ |
| 67 | Launch | Remove password protection | ☐ |
| 68 | Launch | Announce launch on social media | ☐ |
| 69 | Launch | Send launch email to your list | ☐ |
| 70 | Launch | Monitor analytics for first 48 hours | ☐ |
Want this checklist as a printable PDF?
Grab the free Shopify Store Setup Checklist PDF – formatted for printing, fillable on tablet, and ready to share with your team. Download the Free PDF Checklist (insert your email-gated link here)
How Long Does It Take to Set Up a Shopify Store?
Honest answer: it depends on your goals.
- Bare minimum store – 1 day if you have products and assets ready
- Polished launch-ready store – 1–2 weeks
- Custom-designed, fully branded store – 4–8 weeks
- Enterprise migration – 3–6 months
Most solo founders launch a respectable store in 7–14 days if they commit a few hours each day. The slowest part is usually product photography and writing descriptions. Don’t aim for perfect on launch day. Aim for live. You can always improve after.
How Much Does It Cost to Launch a Shopify Store?
Here’s a realistic breakdown for a new Shopify store:
| Expense | Budget | Standard | Premium |
| Shopify plan | $29/mo | $79/mo | $299/mo |
| Domain | $14/yr | $14/yr | $14/yr |
| Theme | Free | $200 (one-time) | $400 (one-time) |
| Logo / branding | DIY | $100–$300 | $1,000+ |
| Product photography | DIY | $300–$500 | $1,500+ |
| Apps | $0 | $50/mo | $200/mo |
| Marketing (first month) | $100 | $500 | $2,000+ |
| First-month total | ~$143 | ~$1,243 | ~$5,413 |
You can absolutely launch a Shopify store for under $200. But investing a bit more upfront in design, photography, and marketing usually pays back faster.
Should You Use a Shopify Setup Service?
A Shopify setup service is a done-for-you offering from a Shopify Partner agency or freelancer. They handle everything from theme installation to launch. You should consider a setup service if:
- You don’t have time to learn the platform
- You want a professional design without learning Figma or HTML
- You’re migrating from another platform (Etsy, WooCommerce, Magento)
- You’re launching with 100+ SKUs
- You need custom features beyond what apps provide
- You want SEO and conversion baked in from day one
Typical setup service costs:
- Basic setup – $500–$2,000 (theme install, products, basic config)
- Standard setup – $3,000–$8,000 (custom design, apps, content)
- Premium setup – $10,000–$30,000+ (fully custom build, migration, training)
A great setup service saves you 50–100 hours of work. It also helps you avoid the rookie mistakes that cost real money – poor checkout flow, broken mobile UX, terrible SEO foundation. Look for Shopify Partners with strong reviews, transparent pricing, and a portfolio that matches your industry.
Common Mistakes to Avoid
After helping hundreds of brands set up Shopify stores, here are the top mistakes we see:
- Skipping market research – Launching without knowing your customer
- Bloated theme customization – Slow load times kill conversions
- Too many apps – Every app slows your store down
- Weak product photography – Customers buy with their eyes
- No abandoned cart flow – You’re leaving 10–20% of revenue on the table
- Ignoring mobile – Most traffic is mobile, design for it first
- Launching with broken pages – Test, test, test
- No marketing plan – A live store with no traffic is invisible
Avoid these, and you’re already ahead of 80% of new stores.
Launch Day and Beyond
Launch day is exciting. But it’s just the start. In the first 30 days post-launch, focus on:
- Driving traffic – Ads, social, influencers, SEO content
- Capturing emails – Welcome popup with discount
- Collecting reviews – Email customers 7 days after delivery
- Reading analytics – Identify drop-off points in your funnel
- Iterating fast – Fix what’s broken, double down on what’s working
Your first 100 orders teach you more than any course. Pay attention.
Final Thoughts: Launch Your Shopify Store With Confidence
Setting up a Shopify store isn’t rocket science. But it does require focus. Follow the 14 steps in this guide. Work through the 70-point checklist. Avoid the common mistakes. And you’ll launch a Shopify store that’s built to grow. If you’d rather skip the learning curve, a professional Shopify setup service can take you from idea to live store in days, not weeks. Either way, the most important step is the next one: start. Your future customers are waiting.
Ready to Launch?
Whether you’re DIY-ing your store or working with experts, the path is the same: plan, build, test, launch, optimize. If you want help, our team specializes in Shopify store setup for new and migrating brands. From day-one configuration to scale-ready stores, we’ve launched stores in every industry.